
You’ve got a wedding invitation in hand, a gala to attend, or a corporate event on your calendar. The dress code reads “formal” or “cocktail attire,” and you’re thinking about renting instead of buying. Smart move. But before you book that stunning Self-Portrait lace number or that dreamy Zimmermann midi, there are a few traps that catch nearly every first-time renter off guard.
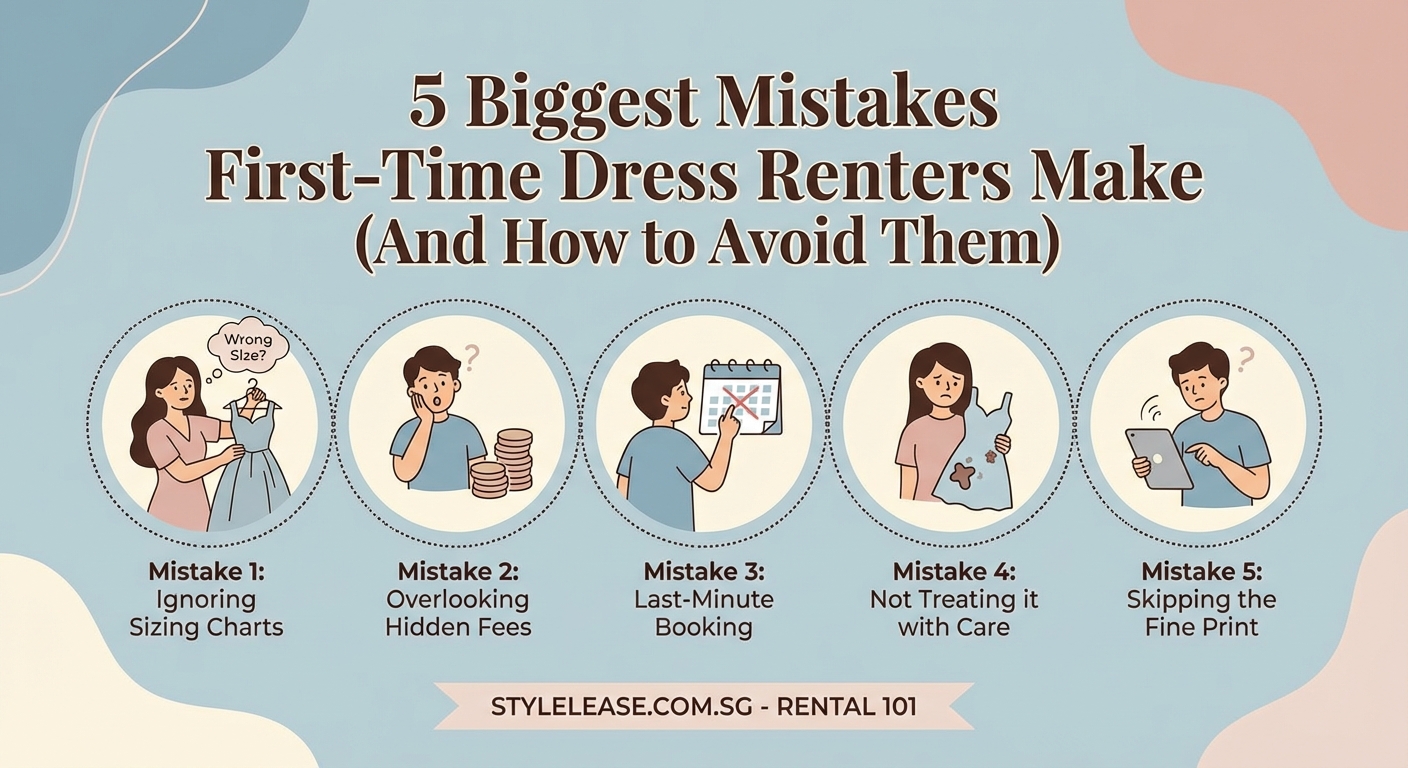
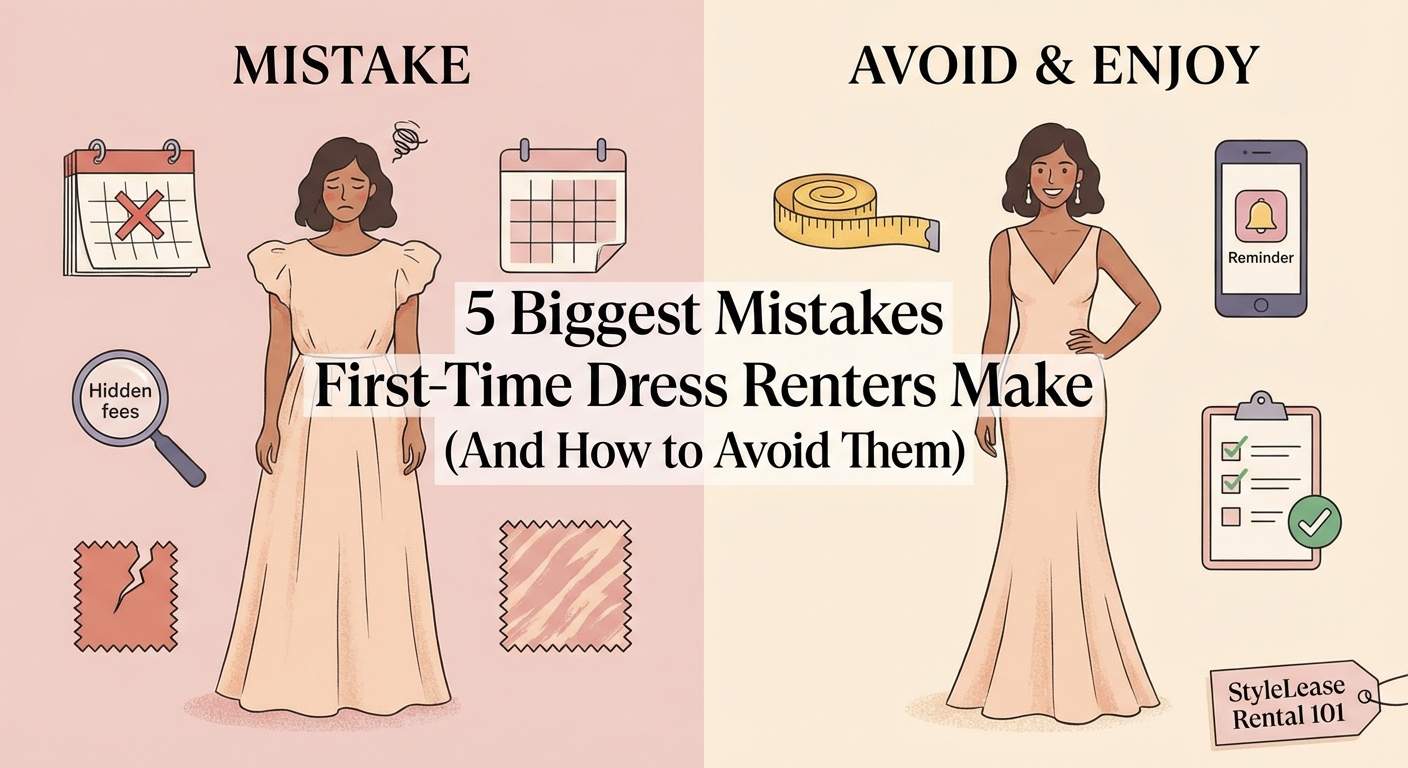
First time dress rental mistakes often stem from booking too late, ignoring fit details, overlooking rental terms, skipping damage checks, and forgetting about styling accessories. Understanding rental timelines, checking measurements carefully, reading policies thoroughly, documenting dress condition, and planning your complete outfit will save you stress and money while ensuring you look stunning at your event.
Booking Your Dress Too Close to the Event Date
The most common mistake? Waiting until two weeks before your event to start browsing.
Here’s the reality. Popular designer pieces get snapped up fast, especially during wedding season from March to June and October to December. That gorgeous gown you spotted on Instagram might already be booked for your exact event date.
Most rental platforms in Singapore require at least 3 to 5 days for delivery and fitting adjustments. Add another few days if alterations are needed. Suddenly, your two-week buffer becomes uncomfortably tight.
Ideal booking timeline:
- Browse and shortlist dresses 4 to 6 weeks before your event
- Book your top choice 3 to 4 weeks out
- Receive the dress 5 to 7 days before the event
- Allow 2 to 3 days for any emergency alterations
This schedule gives you breathing room. If the dress doesn’t fit quite right, you have time to exchange it or make adjustments. If you’re attending a wedding in Singapore, you’ll want that extra buffer to coordinate with the venue’s dress code and weather conditions.
“I always tell first-time renters to book early and try on early. The peace of mind is worth it. You don’t want to be frantically messaging customer service three days before a wedding because the zip won’t close.” — StyleLease fitting consultant
Ignoring Measurements and Fit Details
You know your usual dress size. A size 8, maybe a 10 in some brands. You assume that’s all you need to know.
Not quite.
Designer sizing varies wildly between brands. A Zimmermann size 2 fits differently from a Needle & Thread size 2. European sizing runs smaller than Australian sizing. Some brands cut their dresses generously through the bust but snug at the hips.
Many first-time renters skip the measuring tape entirely. They select based on the size tag they usually buy at Zara or Mango. Then the dress arrives and it’s too tight across the shoulders or gapes at the waist.
What to measure before you book
- Bust (at the fullest part)
- Waist (at the narrowest point)
- Hips (at the fullest part)
- Shoulder to hem length (especially for maxi dresses)
- Arm length (if the dress has sleeves)
Compare your measurements against the size chart provided for each specific dress. Not the general brand chart. The individual dress listing.
Most rental platforms include detailed measurements for each piece. Use them. If a dress lists a 34-inch bust for size M and you measure 36 inches, size up. Fabric has limited give, especially in structured bodices or fitted silhouettes.
| Measurement Error | What Happens | How to Fix |
|---|---|---|
| Ignoring bust measurement | Dress won’t zip or creates unflattering pulling | Always size up if you’re between sizes in the bust |
| Assuming standard hem length | Dress drags on the floor or hits awkwardly at the calf | Check shoulder-to-hem measurement and note your height when booking |
| Skipping hip measurement | Dress fits top but won’t pull down over hips | Measure hips at fullest point and compare to dress specs |
| Guessing sleeve length | Sleeves bunch uncomfortably or restrict movement | Measure from shoulder to wrist if dress has long sleeves |
Overlooking Rental Terms and Hidden Costs
The dress costs $80 to rent for four days. Sounds reasonable. You book it.
Then you notice the additional charges at checkout. Delivery fee. Insurance option. Late return penalty structure. Damage waiver. Dry cleaning fee.
Your $80 rental just became $140.
This isn’t necessarily a scam. It’s just how rental pricing works. But many first-time renters don’t read the full terms before committing. They focus on the headline rental price and miss the fine print.
Common additional costs to watch for:
- Delivery and return shipping
- Insurance or damage protection
- Security deposit (usually refunded)
- Late return fees (often $20 to $50 per day)
- Cleaning fees if you return the dress soiled
- Replacement cost if the dress is damaged beyond repair
Some platforms include insurance automatically. Others make it optional. Read what’s covered. Standard wear and tear? Usually fine. Red wine stains or torn seams? That might cost you.
Also check the rental period. Is it four days? Five days? Does the rental period include the delivery and return days, or just the days you have physical possession of the dress?
If you’re planning to wear the dress to an evening gala, factor in time for photos, the event itself, and safe return shipping. A four-day rental might not be enough if your event falls on a Saturday and return shipping takes two business days.
Skipping the Damage Check When the Dress Arrives
Your rental arrives in a garment bag. You pull it out, admire it, hang it up. You try it on the night before your event.
Perfect.
But did you check the dress for existing damage when it first arrived?
Most renters don’t. They assume the dress is in perfect condition because it’s coming from a professional rental service. Then they return it after their event and suddenly get charged for a stain or a small tear they never caused.
This is where documentation saves you.
Do this the moment your dress arrives:
- Open the package immediately and inspect the dress in good lighting
- Check seams, zips, buttons, and any embellishments
- Look for stains, pulls, loose threads, or missing beads
- Take photos or video of the dress from multiple angles
- Note any issues in writing and message the rental company right away
If there’s existing damage, report it before you wear the dress. Most companies will note it in your file so you’re not held responsible. If you wait until after your event to mention it, they have no way to verify the damage was pre-existing.
The same applies when you return the dress. Photograph it before packing it up. Show that it’s in the same condition (minus normal wear) as when you received it. This creates a paper trail if any disputes arise.
Think of it like renting a car. You do a walk-around inspection before you drive off the lot. Same principle here.
Forgetting About Styling and Accessories
You’ve booked the dress. You’re sorted.
Except you’re not.
The dress is only part of your outfit. You also need shoes, a bag, jewellery, and possibly shapewear or a specific type of bra. Many first-time renters forget this until the day of the event.
Then they’re scrambling to find nude heels that match their skin tone or a clutch that doesn’t clash with their gown. Or they realize the dress requires a strapless bra and they don’t own one.
Some rental services offer accessories as add-ons. Others don’t. Either way, you need to plan your full look, not just the dress.
Styling checklist for your rental dress
- Undergarments (strapless bra, shapewear, seamless underwear)
- Shoes (check heel height and comfort, especially for long events)
- Bag or clutch
- Jewellery (earrings, necklace, bracelet)
- Outerwear (shawl, blazer, or coat if the event is indoors with heavy air conditioning)
- Hair accessories or styling plan
- Makeup plan that complements the dress colour
If you’re unsure what works with your dress, check if the rental platform provides styling suggestions. Many include lookbooks or outfit inspiration. You can also refer to guides like styling essentials when you rent a gown for a complete breakdown.
Colour coordination matters too. If you’re wearing a bold print or a specific shade, your accessories should complement, not compete. A guide to cocktail attire can help you understand what level of formality your accessories should match.
And don’t forget about Singapore’s climate. If your event includes outdoor elements, like a garden party, you’ll need to plan for heat and humidity. Lightweight fabrics, breathable undergarments, and sweat-proof makeup become essential.
Why Renting Still Beats Buying (Even With These Mistakes)
Even if you stumble into one or two of these mistakes, dress rental still offers better value than buying for most occasions.
Consider this. A designer gown costs $800 to $2,000 to purchase. You wear it once, maybe twice if you’re lucky. It takes up wardrobe space. It goes out of style. You eventually donate it or let it gather dust.
Renting that same gown costs $80 to $200. You wear it, return it, and move on. No storage. No guilt. No commitment.
The sustainability angle matters too. Fashion waste is a real problem. Australians alone send 200,000 tonnes of clothing to landfill each year. Singapore’s numbers aren’t much better. Renting extends the life of each garment and reduces demand for new production. If you’re curious about the environmental impact, how long designer dresses last in landfill offers eye-opening context.
Plus, renting gives you access to luxury brands you might not otherwise afford. Want to wear Zimmermann to a wedding? Or try Self-Portrait lace for a gala? Renting makes that possible without the four-figure price tag.
For brides, the calculation shifts slightly, but the logic holds. Many Singapore brides now rent their wedding gowns or at least their reception outfits, freeing up budget for other priorities like the venue or honeymoon.
Getting Your First Rental Right
Your first dress rental doesn’t have to be stressful. With a bit of planning and attention to detail, it’s actually easier than shopping for a new dress.
Start early. Measure carefully. Read the terms. Check for damage. Plan your full outfit.
Those five steps eliminate most of the common pitfalls. The rest is just enjoying the process of trying on beautiful designer pieces without the commitment of ownership.
If you’re still feeling uncertain, a step-by-step guide for beginners walks through every stage of the rental process in detail. And if budget is a concern, knowing how much dress rental actually costs helps you plan accordingly.
The beauty of renting is that it’s low-risk. If something goes slightly wrong, you’re not stuck with an expensive mistake hanging in your wardrobe forever. You learn, adjust, and book smarter next time.
And there will be a next time. Once you experience the convenience and variety of rental, it’s hard to go back to buying.